Setting up SSL certificates with Istio Gateway
SSL certificates are a must these days. They helps protect the data being sent between the server and the client by encrypting it, which gives your website more credibility. In this blog post I will explore a couple of different ways you can obtain SSL certificates and configure the Istio Gateway to use them.
- Cloud-hosted Kubernetes cluster
- Istio 1.13.3 (e.g.
istioctl install) withdefaultnamespace labelled for Istio sidecar injection
Deploying a sample application
apiVersion: v1
kind: ServiceAccount
metadata:
  name: helloworld
---
apiVersion: v1
kind: Service
metadata:
  name: helloworld
  labels:
    app: helloworld
    service: helloworld
spec:
  ports:
    - name: http
      port: 80
      targetPort: 3000
  selector:
    app: helloworld
---
apiVersion: apps/v1
kind: Deployment
metadata:
  name: helloworld
spec:
  replicas: 1
  selector:
    matchLabels:
      app: helloworld
      version: v1
  template:
    metadata:
      labels:
        app: helloworld
        version: v1
    spec:
      serviceAccountName: helloworld
      containers:
        - image: learncloudnative/helloworld:0.1.0
          imagePullPolicy: IfNotPresent
          name: helloworld
          ports:
            - containerPort: 3000
helloworld.yaml and deploy it using kubectl apply -f helloworld.yaml.helloworld application on a public domain, we'll need to create a Gateway resource:apiVersion: networking.istio.io/v1alpha3
kind: Gateway
metadata:
name: public-gateway
spec:
selector:
istio: ingressgateway
servers:
- port:
number: 80
name: http
protocol: HTTP
hosts:
- '*'
gateway.yaml and deploy it using kubectl apply -f gateway.yaml.Note
Check out the Tweet below that explains what*in thehostsfield means and how the Gateway resource relates to the VirtualService.
helloworld Kubernetes service:apiVersion: networking.istio.io/v1alpha3
kind: VirtualService
metadata:
name: helloworld
spec:
hosts:
- '*'
gateways:
- public-gateway
http:
- route:
- destination:
host: helloworld.default.svc.cluster.local
port:
number: 80
virtualservice.yaml and deploy it using kubectl apply -f virtualservice.yaml.kubectl get vs
NAME         GATEWAYS             HOSTS   AGE
helloworld   ["public-gateway"]   ["*"]   106s
GATEWAY_URL environment variable:GATEWAY_IP=$(kubectl get svc -n istio-system istio-ingressgateway -ojsonpath='{.status.loadBalancer.ingress[0].ip}')
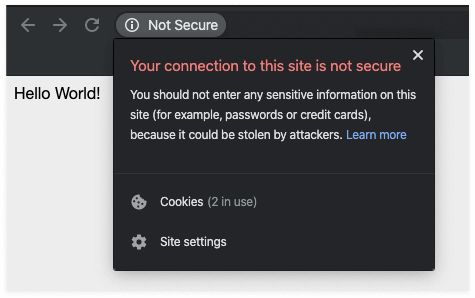
GATEWAY_IP in the browser, you will see something similar to the figure below.
Not Secure message from the browser, which tells the user that the connection is not secure and doesn't instill confidence in your website.Self-signed certs and manual setup
export DOMAIN_NAME=mysuperdomain.com
$DOMAIN_NAME.crt) and the private key used for signing the certificate ($DOMAIN_NAME.key):openssl req -x509 -sha256 -nodes -days 365 -newkey rsa:2048 -subj '/O=$DOMAIN_NAME Inc./CN=$DOMAIN_NAME' -keyout $DOMAIN_NAME.key -out $DOMAIN_NAME.crt
openssl req -out helloworld.$DOMAIN_NAME.csr -newkey rsa:2048 -nodes -keyout helloworld.$DOMAIN_NAME.key -subj "/CN=helloworld.$DOMAIN_NAME/O=hello world from $DOMAIN_NAME"
Generating a 2048 bit RSA private key
....................................+++
..............................................+++
writing new private key to 'helloworld.mysuperdomain.com.key'
openssl x509 -req -days 365 -CA $DOMAIN_NAME.crt -CAkey $DOMAIN_NAME.key -set_serial 0 -in helloworld.$DOMAIN_NAME.csr -out helloworld.$DOMAIN_NAME.crt
Signature ok
subject=/CN=helloworld.mysuperdomain.com/O=hello world from mysuperdomain.com
Getting CA Private Key
.
  |-mysuperdomain.com.key
  |-helloworld.mysuperdomain.com.csr
  |-helloworld.mysuperdomain.com.crt
  |-mysuperdomain.com.crt
  |-helloworld.mysuperdomain.com.key
istio-system namespace.kubectl create secret tls mysuperdomain-certs -n istio-system --key helloworld.$DOMAIN_NAME.key --cert helloworld.$DOMAIN_NAME.crt
secret/mysuperdomain-certs created
apiVersion: networking.istio.io/v1alpha3
kind: Gateway
metadata:
  name: public-gateway
spec:
  selector:
    istio: ingressgateway
  servers:
    - port:
        number: 443
        name: https
        protocol: HTTPS
      tls:
        mode: SIMPLE
        credentialName: mysuperdomain-certs
      hosts:
        - helloworld.mysuperdomain.com
gateway.yaml and deploy it using kubectl apply -f gateway.yaml. We'll overwrite the previous Gateway resource we created using the apply command.hosts field in the VirtualService:apiVersion: networking.istio.io/v1alpha3
kind: VirtualService
metadata:
name: helloworld
spec:
hosts:
- helloworld.mysuperdomain.com
gateways:
- public-gateway
http:
- route:
- destination:
host: helloworld.default.svc.cluster.local
port:
number: 80
virtualservice.yaml and overwrite the existing VirtualService using kubectl apply -f virtualservice.yaml.curl with the --resolve flag. The resolve flag has a format of [DOMAIN]:[PORT]:[IP] and it routes all requests that match the [DOMAIN]:[PORT] portion to the specified IP address. This way, you don't need to go to your DNS/domain registrar and make changes there to be able to test this.curl -v --resolve helloworld.$DOMAIN_NAME:443:$GATEWAY_IP --cacert $DOMAIN_NAME.crt https://helloworld.$DOMAIN_NAME
helloworld.mysuperdomain.com:443 to the external IP address of the ingress gateway. Additionally, we provide the name of the CA certificate we created earlier.helloworld pod:...
* Server certificate:
* subject: CN=helloworld.mysuperdomain.com; O=hello world from mysuperdomain.com
* start date: Nov 30 22:27:11 2019 GMT
* expire date: Nov 29 22:27:11 2020 GMT
* common name: helloworld.mysuperdomain.com (matched)
* issuer: O=mysuperdomain.com Inc.; CN=mysuperdomain.com
* SSL certificate verify ok.
...
<link rel="stylesheet" type="text/css" href="css/style.css" />
<div class="container">
Hello World!
* Connection #0 to host helloworld.mysuperdomain.com left intact
</div>* Closing connection 0
Using ZeroSSL to get the certificates
- Click the New Certificate button to get started.
- Enter the domain name and click the Next Step button. I'll use
startcloudnative.comfor my domain name - Select the 90-Day Certificate and click the Next Step button.
- Select the Free option and click Next Step button.

Set the A name record
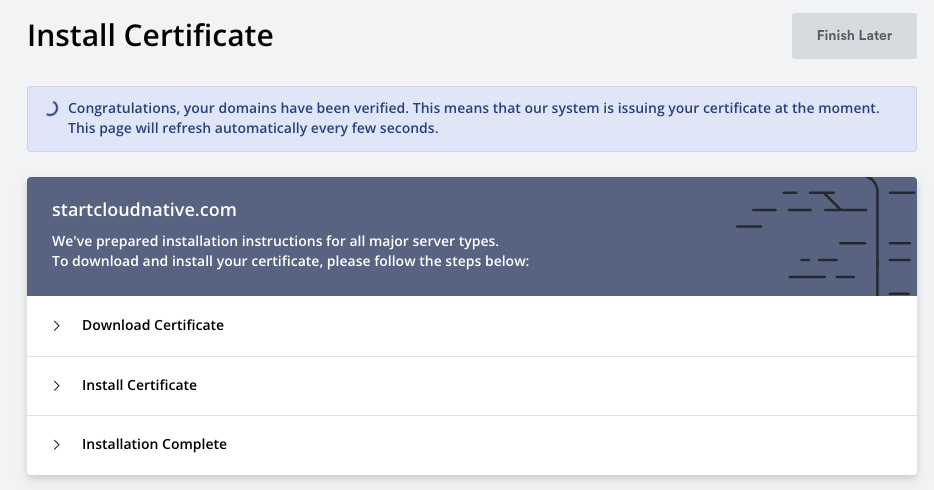
GATEWAY_IP).startcloudnative.com and www.startcloudnative.com. My A record will point from startcloudnative.com to the IP address (the GATEWAY_IP). I won't use the helloworld subdomain as we did previously..zip file with all generated files for your domain. You have an option of picking multiple server types, but leaving it on Default Format is what we want.ca_bundle.crtcertificate.crtprivate.key
Re-creating the secret with a real certificate
kubectl delete mysuperdomain-certs -n istio-system
kubectl create secret tls startcloudnative-certs -n istio-system --key private.key --cert certificate.crt
secret/startcloudnative-certs created
startcloudnative.com with your actual domain name):apiVersion: networking.istio.io/v1alpha3
kind: Gateway
metadata:
name: public-gateway
spec:
selector:
istio: ingressgateway
servers:
- port:
number: 443
name: https
protocol: HTTPS
tls:
mode: SIMPLE
credentialName: startcloudnative-certs
hosts:
- startcloudnative.com
hosts field in the VirtualService:apiVersion: networking.istio.io/v1alpha3
kind: VirtualService
metadata:
name: helloworld
spec:
hosts:
- startcloudnative.com
gateways:
- public-gateway
http:
- route:
- destination:
host: helloworld.default.svc.cluster.local
port:
number: 80
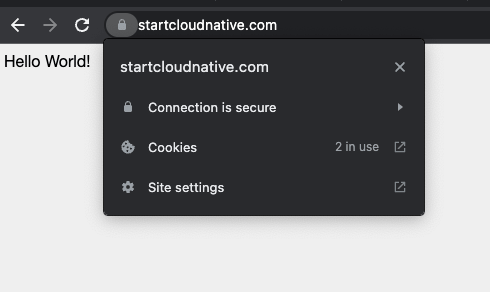
Hello World! response and the padlock before the domain name, which signifies that the website is secure. If you click on the padlock and check the certificate, you will see your domain name in the certificate, the root authority (Let's Encrypt), and the expiration date.
Conclusion
cert-manager to obtain and refresh the certificates before they expire automatically. You can check the Securing Kubernetes Ingress with Ambassador and Let's Encrypt to learn how to do just that.


