How to configure Firebase emulators with Next.js?
Firebase emulators are a suite of Firebase service emulators that allow you to run and test your applications locally. This article describes how to configure and use them with Next.js
backend folder) and the Next.js frontend (web folder). Here's a simplified version of the repo structure:.
├── backend
│ └── functions
└── web
├── node_modules
├── public
└── src
backend folder contains the functions, and it's where you initialize the Firebase project (i.e., run the firebase init com). The web folder contains the Next.js frontend.Launching the Firebase emulators
firebase init, go through the prompts and select the emulators you want to use.firebase.json file:...
"emulators": {
"auth": {
"port": 9099
},
"functions": {
"port": 5001
},
"firestore": {
"port": 8080
},
"database": {
"port": 9000
},
"hosting": {
"port": 5000
},
"pubsub": {
"port": 8085
},
"storage": {
"port": 9199
},
"ui": {
"enabled": true
}
}
firebase emualtors:start command.$ firebase emulators:start
i emulators: Starting emulators: auth, functions, firestore, database, hosting, pubsub
, storage
...
┌─────────────────────────────────────────────────────────────┐
│ ✔ All emulators ready! It is now safe to connect your app. │
│ i View Emulator UI at http://localhost:4000 │
└─────────────────────────────────────────────────────────────┘
┌────────────────┬──────────────────────────────────┬─────────────────────────────────┐
│ Emulator │ Host:Port │ View in Emulator UI │
├────────────────┼──────────────────────────────────┼─────────────────────────────────┤
│ Authentication │ localhost:9099 │ http://localhost:4000/auth │
├────────────────┼──────────────────────────────────┼─────────────────────────────────┤
│ Functions │ localhost:5001 │ http://localhost:4000/functions │
├────────────────┼──────────────────────────────────┼─────────────────────────────────┤
│ Firestore │ localhost:8080 │ http://localhost:4000/firestore │
├────────────────┼──────────────────────────────────┼─────────────────────────────────┤
│ Database │ localhost:9000 │ http://localhost:4000/database │
├────────────────┼──────────────────────────────────┼─────────────────────────────────┤
│ Hosting │ Failed to initialize (see above) │ │
├────────────────┼──────────────────────────────────┼─────────────────────────────────┤
│ Pub/Sub │ localhost:8085 │ n/a │
├────────────────┼──────────────────────────────────┼─────────────────────────────────┤
│ Storage │ localhost:9199 │ http://localhost:4000/storage │
└────────────────┴──────────────────────────────────┴─────────────────────────────────┘
Emulator Hub running at localhost:4400
Other reserved ports: 4500
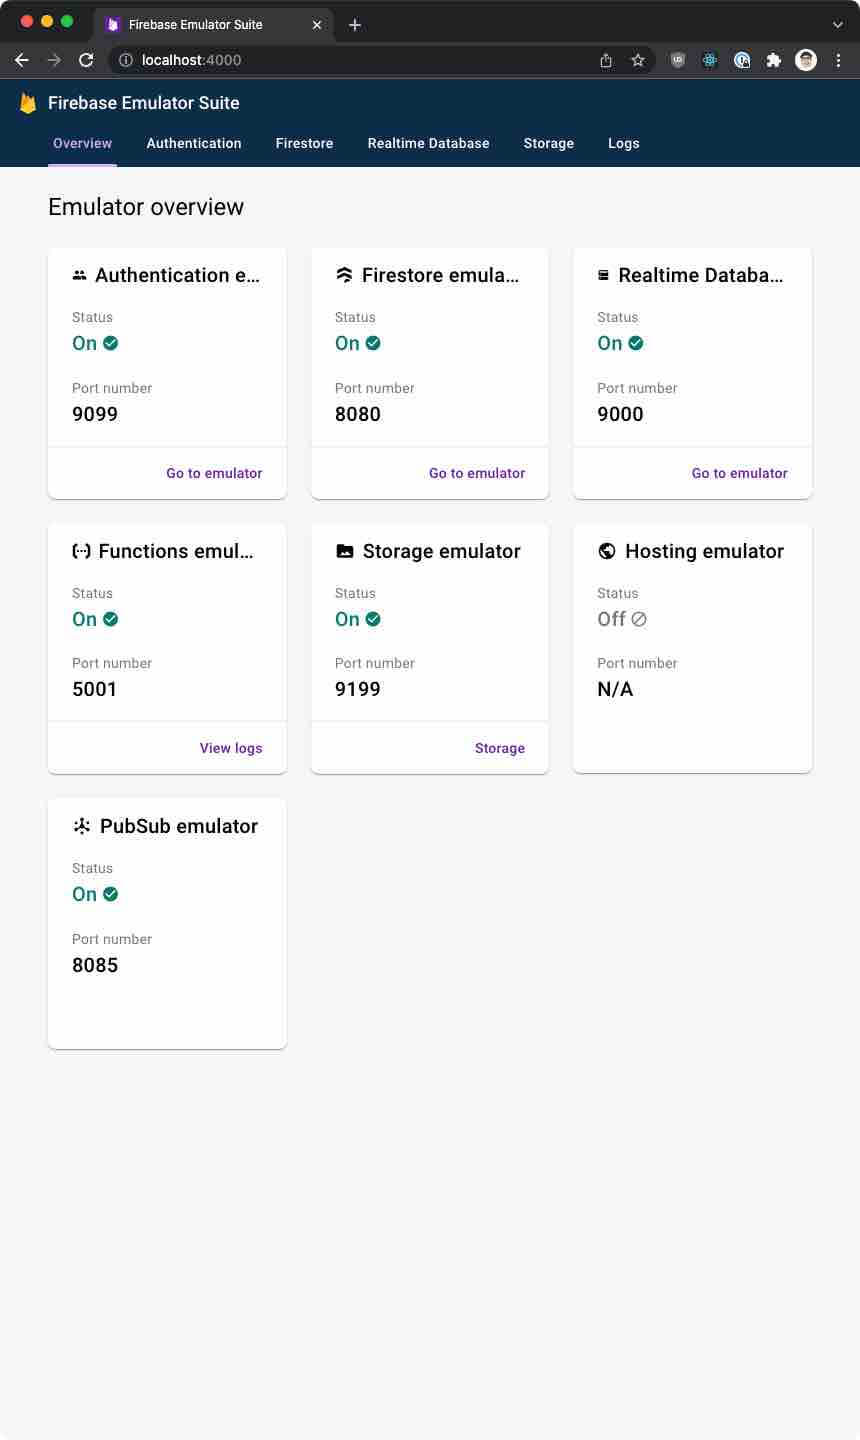
localhost:4000 - it should look similar to the figure below.
Connecting to the emulators from Next.js
firebase library) or the backend (using the firebase-admin library).connectXYZEmulator function. I am also using the reactfire library that implements providers for each service - that's where I decide whether to connect to the emulator or not.FirebaseAuthProvider function, I do something like this:import {
useFirebaseApp,
} from 'reactfire';
import {
connectAuthEmulator,
getAuth
} from 'firebase/auth';
function shouldConnectAuthEmulator(): boolean {
// You could do any logic here to decide whether to connect to the emulator or not
return process.env.NODE_ENV === 'development');
}
function getAuthEmulatorHost(): string {
// You'd read this from config/environment variable/etc.
return 'localhost:9099';
}
export const FirebaseAuthProvider = ({ children }) => {
const app = useFirebaseApp();
const auth = getAuth(app);
if (shouldConnectAuthEmulator()) {
connectAuthEmulator(auth, getAuthEmulatorHost());
}
...
}
connectAuthEmulator will connect to the local Authentication emulator. Similarly, you can connect to other emulators.Connecting from the backend using firebase-admin
firebase-admin library is meant to be used for accessing Firebase from server environments (as opposed to frontend and client browsers).firebase-admin library in the backend scenario, you have to provide a private key to connect to the Firebase. It would be best never to share the private key as it gives administrative access to the Firebase. Hence, you'd only use the Firebase admin library from trusted environments and never from the client (frontend).Note
Read more on how to set up Firebase on a server here
connectXYZEmulator functions. Instead, you'll have to set environment variables that point to the emulators.FIREBASE_AUTH_EMULATOR_HOST environment variable to localhost:9099. Similarly, you'd set FIREBASE_STORAGE_EMULATOR_HOST for Storage and FIREBASE_FUNCTIONS_EMULATOR_HOST for Functions so on. You can check more details in the documentation here.


